
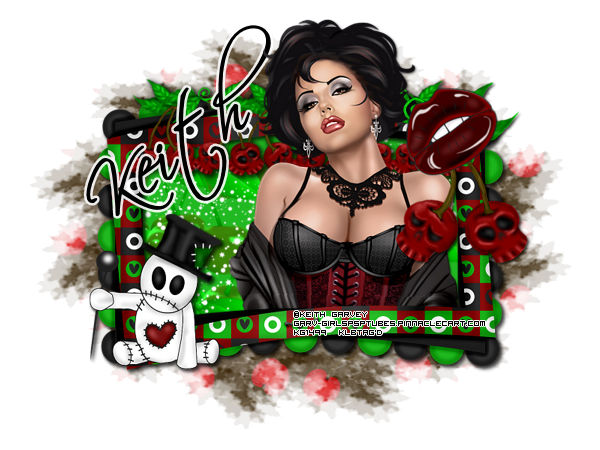
I am using the awesome artwork of Keith Garvey. You can now buy his tubes in his store at Garv Girls. You have to have a license to use his artwork.
This
tutorial assumes that you have working knowledge of Paint Shop Pro and it’s
tools. This tutorial was written by
Valerie Atwell of KLBDesignz, on August 15, 2012.
You may not copy it, distribute it or claim it as your own. I do not allow translation of my
tutorials. You are welcome to include a
link back to my tutorial for your groups and forums. If this tutorial resembles any other in
existence, it is purely coincidence.
What you need:
Cherry Emo Scrap Kit by Kittz: Cherry Emo by Kittz
Choice of tube
Choice of font
Mura Meister Copies HERE
Round mask of choice (I found great ones at Weescotslass's Blog)
Open EC-5. Shift + D to duplicate. Close the Original. Go to Images, Canvas Size and set it to 800 x 600. We will re-size later. Adjust, Sharpness, Sharpen.
Grab your Selection tool and set it to rectangle. Draw a rectangle a bit bigger than the opening of the frame. Add a new layer. Flood fill with a coordinating color to your frame. I chose the green from the frame. Select none and move it to the bottom on your layers palette.
Open your tube. Copy and paste as a new layer. Re-size if necessary. Duplicate the tube and move the original to below the frame. On the top tube layer, you will want to erase until it looks like your tube is "coming out" of the frame. See my sample for reference.
Add a drop shadow to the original tube layer. I used V-2; H-2; O-80; B-5; Color-Black.
Open EC-8. Copy and paste as a new layer. Re-size by 50%. Go to Image, Free Rotate by 35. Adjust, Sharpness, Sharpen. Move it to the top right corner of the frame on top of the top tube layer.
Open EC-2. Copy and paste as a new layer. Re-size by 60%. Adjust, Sharpness, Sharpen. Move this layer under the lip layer on the layers palette. Position so that it is hanging under the lips. Add a drop shadow.
Activate your frame fill layer (the green layer on my sample). Open EC-36. Copy and paste as a new layer. Re-size by 50%. Move it to the left side of the frame. Duplicate and mirror. Right click on the duplicate layer. Merge, merge down.
Re-activate the fill layer. Selections, Select all, Float, Defloat. Activate the "sparkle" layer. Selections, Invert. Hit delete on your keyboard. Selections, select none.
Open EC-43. Copy and paste as a new layer. Move into the center of the frame. Re-size by 70%. Go to Effects, Plugins, Muras Meister, Copies. Use the default settings except set the Number at 3 and the Tile Gap at 6. Activate the frame fill. Selections, Select All, Float, Defloat.
Activate the cherry layer. Selections, Invert, Delete. Set the blend mode of this layer to Overlay. Move it under the "sparkle" layer.
Now, open a paper of your choice from the kit. Copy and paste as a new layer. Move it to the bottom of the layers palette. Apply your round mask.
Add your copyright information and the name. I used a thin white glow on mine.
Re-size to your liking. I re-sized the width to 600.
Save as a PNG if you aren't going to animate to get a transparent background.
To add an animation:
Open Animation Shop (AS).
In PSP: Turn off all layers of your tag except the fill layer, cherries and sparkles. Edit, Copy Merged.
Back to AS:
Paste as a new animation.
Choose a horizontal sparkly animation. Open the animation in AS.
Re-size the animation as needed. Also, note the number of frames in your animation.
On your tag animation canvas. Right click and duplicate selected until you get the same number of frames as the sparkly animation.
Move the scroll bar to the first frame. Hit Cntrl + A to select all of the frames. Do the same on your sparkle animation.
Click and drag your sparkle animation to your tag animation. Be sure you position it where you want it before you let go of the mouse. (You may have to undo and redo it a few times to get it where you want it.)
In PSP: Activate the mask layer. Edit, Copy. In AS: Paste as a new animation. Repeat the duplication process above. You will need to drag the animated piece to the mask piece so that the animation is on top of the mask.
In PSP: Close off the fill layer, cherries, sparkles and mask layers. Open every other layer (click on the eye to open it). Edit, copy merged.
In AS: paste as a new animation. Repeat the duplication process above. This time you will drag this canvas onto the mask piece.
Test your animation by going to View, Animation. (or the same icon on the toolbar)
You can slow down the animation by right clicking and choosing Frame Properties. Set it to 15.
Now, right click again. Go to Animation Properties. Toggle the Opaque and set the color to white.
Save using the default optimization.

Thanks for trying my tutorial. I would love to see your results. Feel free to post them on my Facebook page.
No comments:
Post a Comment